Weekly planner
In this section, up to ten week planners can be created, each with up to four time profiles. One of the ten weekly planners can be set as the “default” and assumes the role of the default week planner when creating and importing participants. The predefined week planners can be applied to individual existing participants or to entire groups of existing participants. The week planners can now also be applied for specific alerts.
In the week planner, it is possible to define the respective media cascade for each time profile on the basis of the medium designation. This happens by enabling or disabling the desired media for each profile. They can be organised into the order required using the drop-down menu. If necessary, all of the media can be triggered simultaneously.
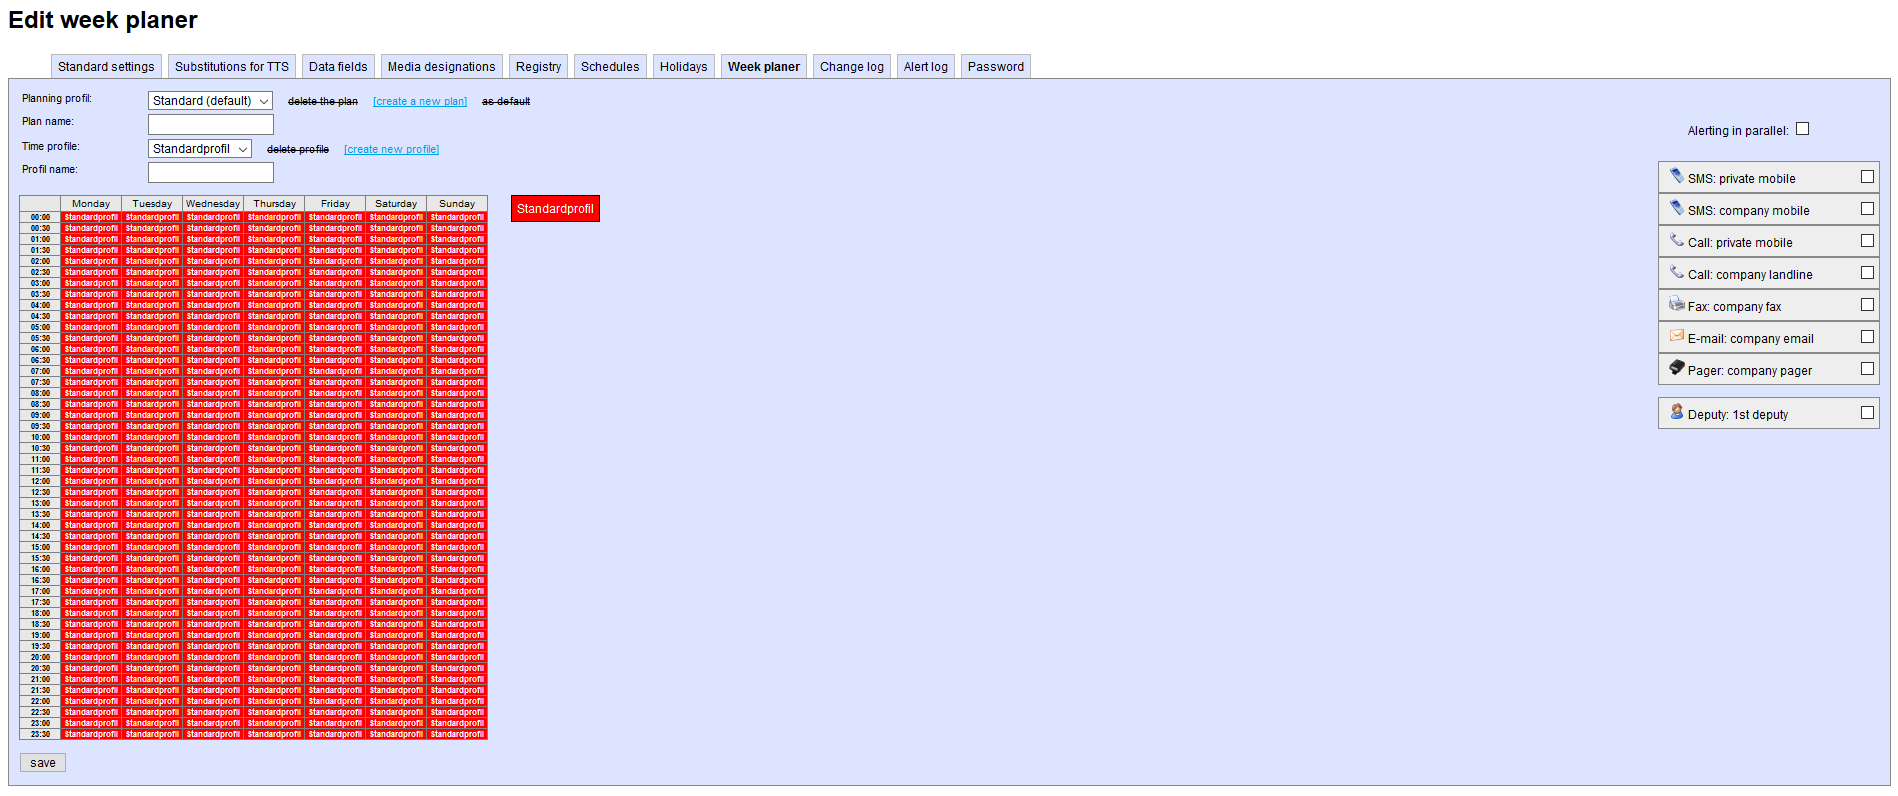
Create new plan
To create a new weekly plan, enter the name in the “Plan name” field and click on [create a new plan].

To populate the plan you created, you must first create profiles. To do so, enter the name you want to give the plan under “Profile name” and click the [create new profile] button to confirm. The profiles you created will be displayed in different colours to the right of the weekly view chart. This example uses two profiles, “Day” and “Night”.
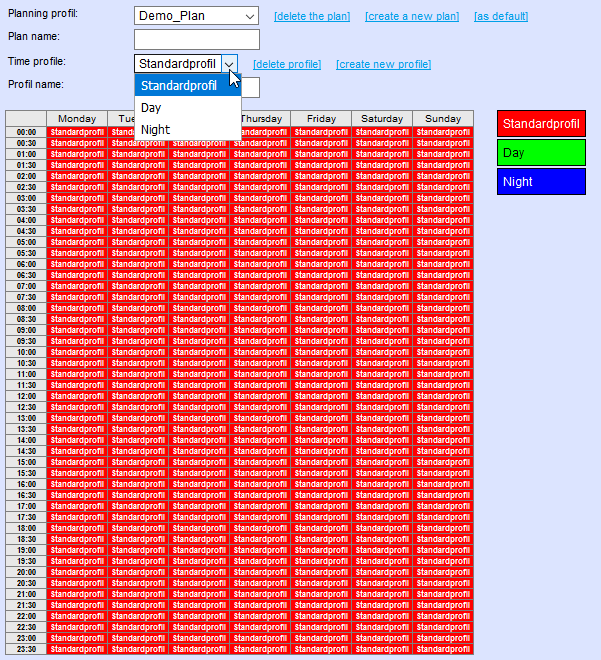
If you select the desired profile from the “Time profile” drop-down menu, you can select the desired alert media on the right-hand side. For example, you could decide to only alert company media during the day.

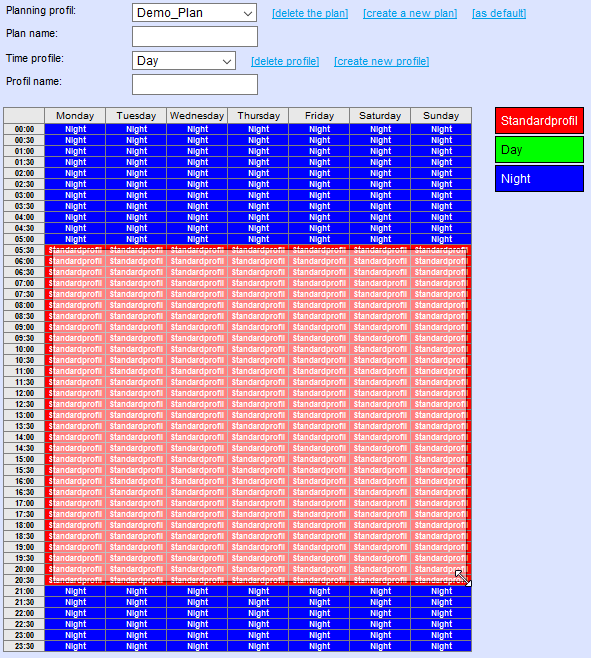
Now select the desired profile from the “Time Profile” drop-down menu and select the time windows from the chart during which this profile should apply.
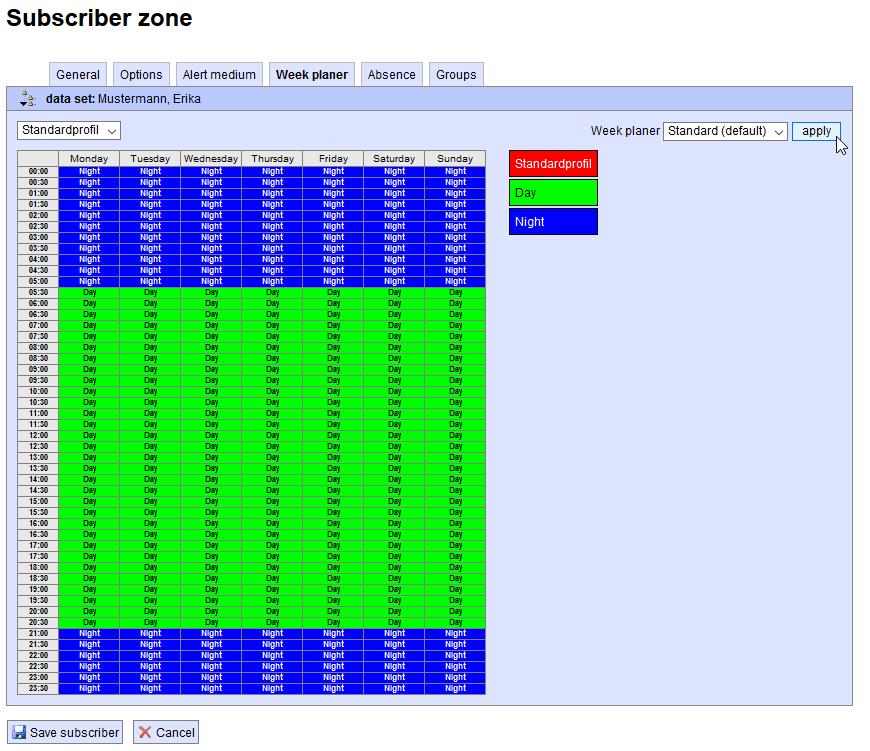
Assign a plan
You can assign a weekly schedule to a subscriber by selecting the “Week plan” tab in their Subscriber zone and then selecting the desired plan and pressing “Apply” to confirm.
The plan can be customised here by selecting a profile and changing the chart.