Organisational chart/tree view
Organisational chart/tree view
The “Organisational chart / tree view” menu lets you create and manage your alert and mobilisation structure as a tree diagram.

Tree view
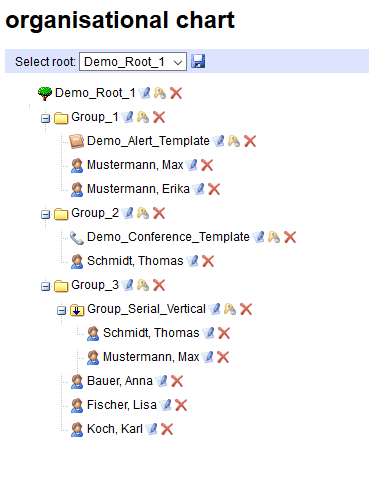
The current root along with its subordinate folders and subscribers is displayed on the left side.
A root represents the highest hierarchical level that one or more groups can be assigned to.
The group itself can also, in turn, contain one or more groups. One or more subscriber can be assigned to a group. A group or subscriber can exist more than once within the organisational structure, but by default are not permitted to appear again in the same root.
The group and the subscriber can be assigned to a root/group using drag and drop.
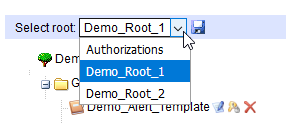
Switch between different roots in the “Select root” drop-down menu.
If you use the delete icon ![]() to delete groups or subscribers, they are only removed from the structure, but still remain in the system.
to delete groups or subscribers, they are only removed from the structure, but still remain in the system.
Available
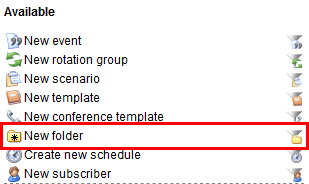
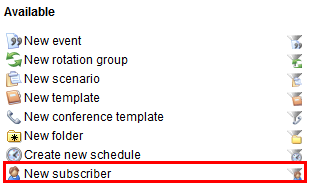
You can see which actions are possible in the right-hand taskbar under “Available”. Use this to create and add new scenarios, templates, conference templates,
folders, schedules and/or subscribers. The lower part lists existing subscribers, folders, scenarios, etc.
Use the filter icons  on the right to determine which records are displayed, or use the filter function
 to search for a specific folder/subscriber.

If you use the delete icon ![]() to delete entries such as groups, subscribers or templates, they will be permanently removed from the system and all structures! Subordinate units are not deleted, however.
to delete entries such as groups, subscribers or templates, they will be permanently removed from the system and all structures! Subordinate units are not deleted, however.
Root
To create a new root, first enter the name in the “New root” field  and confirm by clicking on “Create”.
The created root is listed immediately in the display field. If the chosen name has already been used, a warning message appears. The Edit-icon
 opens the “Organisation area”,
where a name, contact and addresses as well as further options can be added to the root.
opens the “Organisation area”,
where a name, contact and addresses as well as further options can be added to the root.

Organisation area root
- Name, contact, headquater address: Enter the contact and address details of the root here
- Hierarchy: Displays the subfolders (first level only)
- Group Schedule: Assign a resource plan defined in the Resource plans menu to the root
- Status fallback conferencing: Define whether a group is an emergency alert group
- Group pager: A group pager can be defined here.
The key icon  lets you manage the root’s permissions.
For further details, see “Co-user management”
lets you manage the root’s permissions.
For further details, see “Co-user management”
Group
New groups can be created under “Available”. To do so, click on the “New folder” option,
enter a name for the group and confirm the creation of the new group by pressing the “Enter” button.
Once the group has been created, it is listed in the lower display field. It is also possible to edit the new group further using the Edit icon
and, as with the root, add detailed information such as a name, contact and address.

Organisation area groups
- Name, contact, headquarter address: Enter the contact and address details of the unit/group here
- Hierarchy: Displays the higher and lower-level roots/groups
- Group members: Displays all subscribers belonging to this order (from all hierarchies)
- Status fallback conferencing (optional module): Indicates whether a group is an emergency alert group. For more information, go to “Emergency alerts”
- Group pager: A group pager can be defined here.
Although the delete function ![]() permanently deletes the created groups, any subscribers contained within the group are retained and only their assignment to this group is eliminated.
permanently deletes the created groups, any subscribers contained within the group are retained and only their assignment to this group is eliminated.
Drag and drop makes it easy to add the folder to a root or another folder.
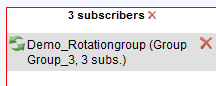
Rotation group (optional module)
Rotation groups make it possible for alerts to automatically be sent to a changing target group. Assign several units to a rotation group. In case of an alert, only one of the units will be alerted. The next time the same rotation group is alerted, the system makes a note of which unit was most recently alerted and selects the next unit in the list.
A new rotation group can be created under “Available”. To do so, click on the “New rotation group” option, enter a name for the group and confirm the creation of the new group by pressing the “Enter” button.
Then assign the rotation group to the tree structure and use drag and drop to fill it with the desired units.
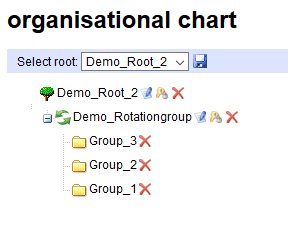
When an alert is issued (manually or through a template), the information in brackets indicates which group will receive the alert.
Subscribers
New subscribers can be created directly using the same process as for groups. To do so, click on the “New subscriber” option, enter a name for the subscriber and confirm the creation by pressing the “Enter” button.
The edit icon
takes you to the subscriber zone, where you have the opportunity to edit the subscriber.
Important: The alert medium and any other applicable information should be entered after the new subscriber has been created.
Attention: The delete function ![]() irrevocably deletes the subscriber.
irrevocably deletes the subscriber.
Drag and drop makes it easy to add the subscriber to one or more groups. Each subscriber should be assigned to at least one group.
Fallback conferencing (optional module)
Groups with subscribers created at the lowest level can be selected to receive emergency alerts.
That ensures that alerts can continue to be issued even in the event of an eAlarm failure. eAlarm is synchronised with external services on an hourly basis.
To change this, go to the “Mutation” tab and the “Organisation chart/tree view” menu. Click on the Edit icon of the desired group.
Then tick the “Group is an emergency alert group” checkbox under “Emergency Alert Status”.

Confirm your change by clicking on “Save”.
The external system will now generate a 6-digit code. You need this so that you can use the NUMBER (sent to you when the module was activated) to trigger the alert for the group. A new updated emergency alert list will also be generated and sent by e-mail at that time.
To see who is currently in the “Emergency Alert Group”, click on “Download group information as a PDF”.
Serial vertical escalation
Serial alert
Folders can be configured so that serial alerts are issued vertically.
Normally, subscribers are alerted at the same time (if more than two). The first defined alert medium is always used first, then the second and so on.
This does not hold true for serial vertical escalation.
The underlying idea behind this is that the subscriber is alerted via all the defined alert mediums before the alert is sent to the next subscriber. However, if an alert is acknowledged by the first subscriber, an alert will NO LONGER be sent to the next subscriber. On the other hand, if the alert is rejected by the first subscriber, an alert will then be sent to the next subscriber. The alert is also sent to the second subscriber if the first subscriber does not acknowledge any of the alert media.
To change this, go to the “Mutation” tab and the “Organisational chart/tree view” menu. Click on the Edit icon
of the desired group (this group must only contain subscribers, not templates, time controls, etc.). Under “Name”, change the folder type to “Serial vertical” (the standard setting is “default”).

Confirm your change by clicking on “Save”.
The folder will then be displayed with an arrow icon in the organisational chart. You can then use drag and drop to arrange the subscribers into the desired order.