List of subscribers
List of subscribers
The subscriber list is a table containing every subscriber.

Use the  icon to modify the columns displayed.
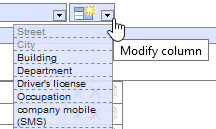
New sorting criteria can also be defined in the admin area under the “Data fields” menu. Click on the triangle (sorting criteria) of the drop-down menu at the bottom right to delete unwanted criteria from the display line; you can use drag and drop to reorganise the columns.
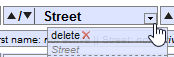
Use the arrows to sort the list alphabetically or in reverse alphabetical order, according to different criteria.
Individual subscribers can be transferred from the subscriber list to the right-hand column using drag and drop
(or by double-clicking) or click on “All into alert list” 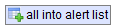 to add all subscribers displayed.
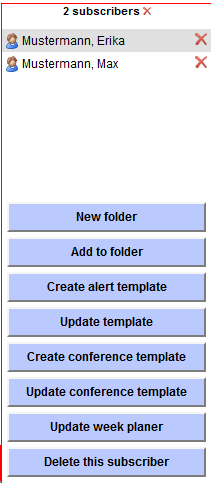
The following actions can be performed in this column:
- New folder (enter subscribers and add to a new group)
- Add to folder (add subscribers to an existing group)
- Create alert template
- Update alert template
- Create conference template
- Update conference template
- Update week planer
- Delete this subscriber
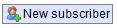
New subscribers can also be entered in the subscriber list. Click on “New subscriber”
 to open the subscriber zone. The Edit icon
 can be used to edit all subscribers that have already been entered in the subscriber zone at any time.
Existing subscribers can also be copied. When you do this, all of the data sets are also copied. This can be done using the Copy icon
 next to a subscriber.
Once the Copy icon has been clicked, a copy of the subscriber is created. The system names it “copy 1”.
next to a subscriber.
Once the Copy icon has been clicked, a copy of the subscriber is created. The system names it “copy 1”.

Filter options
There are different ways to filter the subscriber list.
- Use the letter column along the left edge of the list to sort the subscribers by the first letter of their (last) name
- Use the filter bar
 at the top of the list to customise your filter and only show subscribers of a specific city, for example. To do so, enter the city you want to search for in the
filter field of the “City” column and click on “Apply filter”. The “Filter” column shows which filters are currently active:
at the top of the list to customise your filter and only show subscribers of a specific city, for example. To do so, enter the city you want to search for in the
filter field of the “City” column and click on “Apply filter”. The “Filter” column shows which filters are currently active:
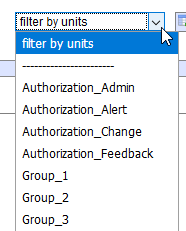
- Use the drop-down menu in the upper-right part of the screen to filter subscribers by unit
- The subscriber icons in the upper right part of the screen
 let you hide and show subscribers whose status
is “Available”/“in mission” (this subscriber is involved in a running alert)/“absent” (absence notice in the subscriber area).
let you hide and show subscribers whose status
is “Available”/“in mission” (this subscriber is involved in a running alert)/“absent” (absence notice in the subscriber area).
You can combine filters as desired. Use the filter icon in the upper left  to reset all filter options.
Subscriber zone
Clicking on the Edit icon next to a subscriber will take you to the Subscriber zone.
All of a subscriber’s relevant attributes can be defined and edited here.
Remember to save your changes by clickig on  before leaving the subscriber zone.
General
The subscriber’s contact details and language are saved in the General section. You can also define the subscriber’s login name, PIN and password.
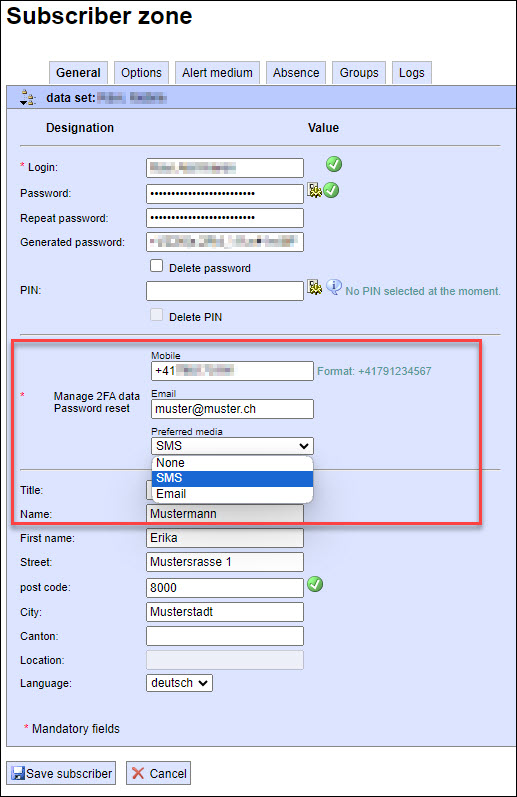
Two-factor authentication (2FA):
We recommend that you protect access to the eAlarm portal for subscribers with the 2FA function. Enter the subscriber’s cell phone number and/or e-mail address in the input fields. Under “Preferred method”, you can specify the delivery of the OTP (OneTimePassword) to the subscriber’s cell phone number or e-mail address.
If you do not want to secure the account with the 2FA function, select “None” under “Preferred method”.
Switching off the 2FA function is only possible if your administrator allows this. The administrator in your company has the option of making the 2FA function mandatory for everyone via the registry key.
Important:
Regardless of the “Preferred method” selected, the subscriber’s stored cell phone number or e-mail address will be used to reset the password.
Options
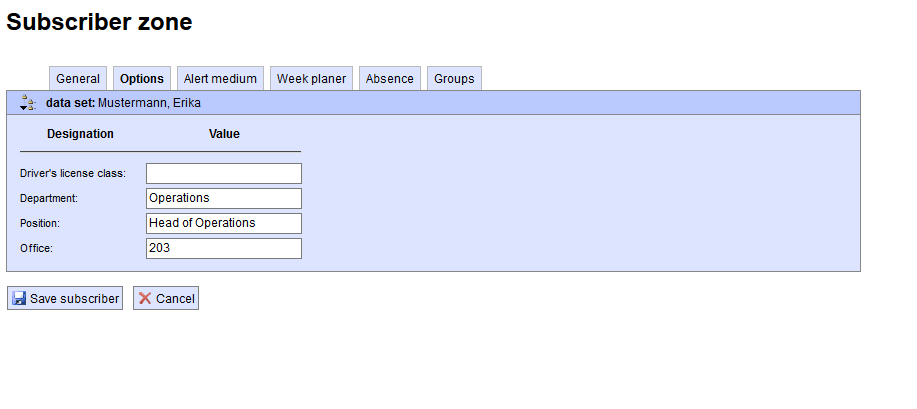
Other criteria can be added in the Optional section (e.g. department, function, training, building) that can simplify searches for target people or their groups based on these criteria. Optional data fields can be defined in the Admin area in the “Data fields” menu.
Alert media
A subscriber’s available alert media can be added, displayed and managed on the “Alert medium” tab. The alert media must be defined under Media designation in the Admin area during first-time entry.
In addition, you can display, modify and create time profiles here.
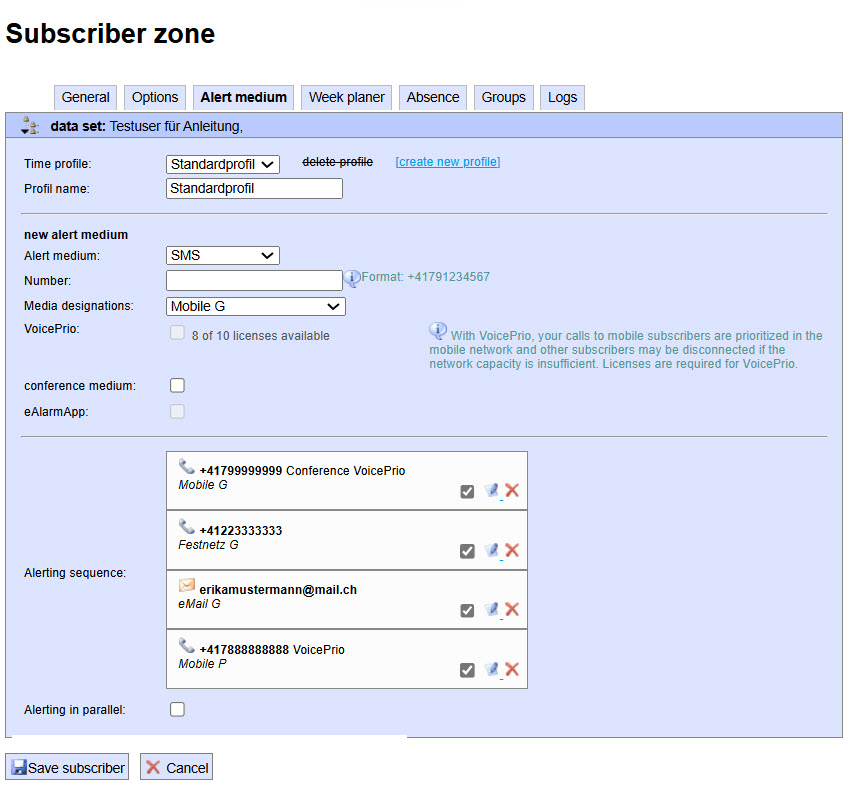
To add a new alert medium, first select the desired medium from the “Alert medium” drop-down menu, enter the corresponding number or address in the “Number” field,
and select the label in the “Media Designations” field. The system automatically checks for permissible formats.
If an alert medium is also intended to be used as a conference medium, tick the corresponding box
 .
Media can also be marked as “private”; they will then be displayed anonymously (option must first be activated in the Admin area under Registry)
.
Media can also be marked as “private”; they will then be displayed anonymously (option must first be activated in the Admin area under Registry)

Click on “Add”
 wird das Alarmmittel hinzugefügt.
The various alert media are listed in the order in which they were entered. Based on this order/cascade, an alert is raised by first alerting the top alert medium and the alert is then forwarded to the next medium. The alert order can be flexibly changed by clicking an alert medium and shifting it up or down using the drag & drop function.
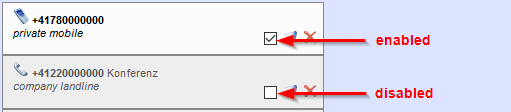
Attention: An alert medium must be activated first before it can be used. Do this by ticking the box next to the alert. Inactive alerts are shown in grey. In the example shown, the alert medium is no longer included in the alert.
If a parallel alert is desired, i.e. alerts should be issued on all of a subscriber’s alert media at the same time, tick the checkbox next to the field “Alerting in parallel”

An alert medium can be edited using the Edit icon
and deleted using the delete icon ![]() .
.
VoicePrio can be used to prioritize calls in the mobile network (Swisscom). VoicePrio is subject to license and only available for Swisscom Mobile.
If you have activated the “Week planner” module (optional module) and assigned a plan to the subscriber on the Week planner tab, you can display, change and define the new time profiles here.
To do so, select the corresponding profile from the “Time profile” drop-down menu. The lower portion of the screen shows which alert media are active/inactive for this profile and make any necessary changes.
 You can also create a new profile (even without an assigned weekly planner). To do this, click on “New profile”, give it a name and define the corresponding alert media.
 Then switch to the “Weekly planner” tab where the newly created profile will be displayed and you can assign it to a timeframe.

Week planner
 A previously defined weekly plan can be assigned to the subscriber in the “Weekly planner” menu. Do this by selecting the desired plan from the “Weekly planner” drop-down menu and confirming your selection by clicking “Apply”.
You can modify the plan by selecting the corresponding profile in the drop-down menu on the left and reassigning it in the calendar view.
A previously defined weekly plan can be assigned to the subscriber in the “Weekly planner” menu. Do this by selecting the desired plan from the “Weekly planner” drop-down menu and confirming your selection by clicking “Apply”.
You can modify the plan by selecting the corresponding profile in the drop-down menu on the left and reassigning it in the calendar view.
Absence
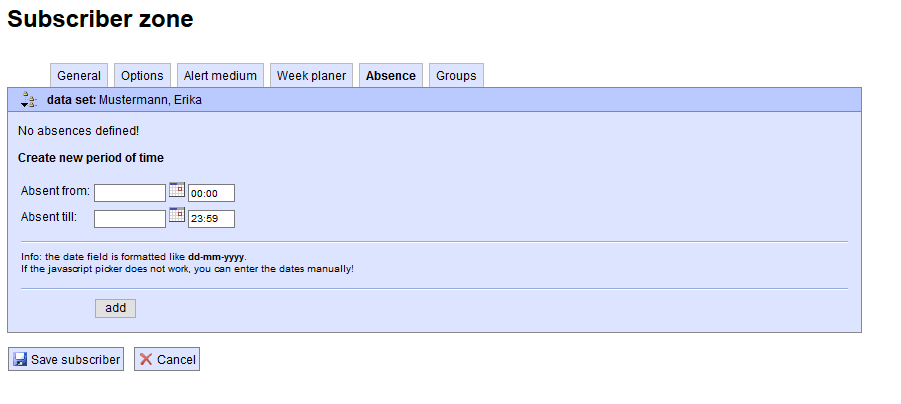
Periods of time can be defined in the “Absence” menu during which a subscriber cannot be reached (e.g. due to illness or vacation).
Groups
A subscriber can be directly assigned to a group in the “Groups” menu.

The available groups are on the left whereas the group(s) in which the subscriber is already a member are shown on the right.
Use the search bar 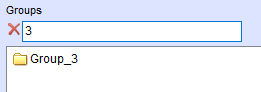 to search for a specific group. Select several groups at once by pressing and holding down the “Ctrl” or “Shift” key.
Click on “Apply” to add the subscriber to the selected group(s).
to search for a specific group. Select several groups at once by pressing and holding down the “Ctrl” or “Shift” key.
Click on “Apply” to add the subscriber to the selected group(s).
Attention: Each group and each subscriber must be mapped in at least one root, otherwise they cannot be alerted / modified by other co-users! If the changes are made only to the master user, this vital step is often overlooked. Other co-users can only see and use these elements if the group and subscribers are attached in a root.